- Published on
SunshineCTF - pegasus challenge
Introduction
Between September 27 and 29 a small but interesting US CTF took place (SunshineCTF). In addition to the usual PWN, reverse, and crypto tasks, the event included i95 (an easier PWN-style challenge) and the Pegasus challenge set. We solved two Pegasus tasks. The third one might also have been solvable, but these tasks were nontrivial and took some time. This write-up focuses on the Pegasus problems.
PEGASUS
- Portable
- Executable
- Generic
- Architecture
- Supporting
- Unusual
- Systems
See the "EAR Essential Architecture Reference v3" for details. For example, EARv3 is documented to use 8-bit bytes, a 16-bit virtual address space, and 24-bit physical addressing
The authors ship a tool called runpeg that runs Pegasus programs and also provides a debugger, disassembler and tracer — a very capable utility. But at first I tried debugging with real pc gdb:
gdb --args ./runpeg ./AccessCode.peg
but that was awkward. The runpeg options proved much more convenient:
runpeg [-dhkltuv] [OPTIONS] input1.peg {inputN.peg...}

Options:
    -t, --timeout <seconds>      Max number of seconds to run before exiting
            --bootrom <filepath>     Path to the bootrom image to use (flat binary or PEGASUS file)
            --plugin <filepath>      Path to a plugin library to load as a checker module
            --plugin-arg <keyval>    Format like 'key=value', will be passed to all loaded checker modules
            --function <funcname>    Resolve the named symbol and call it as a function
    -d, --debug                  Enable the EAR debugger
            --debug-noninvasive      Enable the EAR debugger in non-invasive mode
    -k, --kernel-debug           Enable kernel debugging
            --trace                  Print every instruction as it runs (only usermode)
            --kernel-trace           Print every instruction as it runs (both usermode and kernelmode)
    -u, --uart                   Show output written to port 0xD (kernel debug UART)
    -v, --verbose                Enable verbose mode for EAR emulator
            --input-fd <fd>          Use a different file descriptor as port 0 input
            --output-fd <fd>         Use a different file descriptor as port 0 output
    -l, --io-listen <sockpath>   Use the path to a UNIX domain socket for port 0 input/output
            --io-quiet               Don't print an info message when listening for an incoming connection
runpeg also includes a hex editor that lets you view emulator memory. The editor does not allow direct in-place memory edits, but you can attach to the running process with pwndbg using the process ID (pwndbg -p <pid>) to modify memory as needed.
The following sections describe how we reverse-engineered the EAR/PEGASUS architecture and the techniques used to solve the challenges.
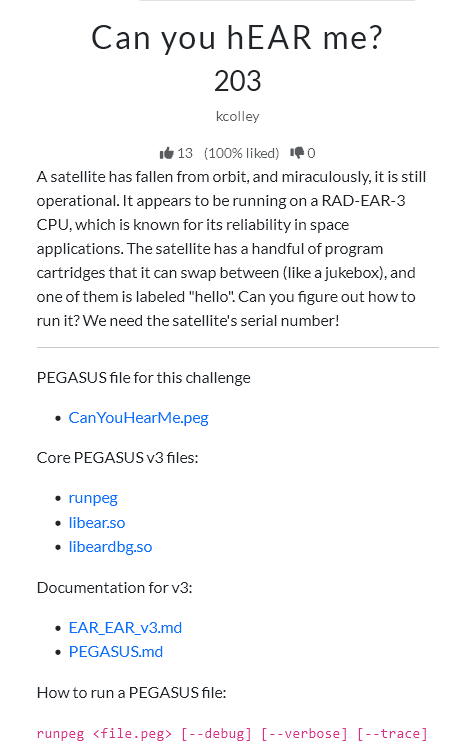
Can you hEAR me?
Writeup author: michalBB
The first task is fairly simple — just run the Pegasus emulator and you'll get the flag. However, you must place all required libraries into the directory.
LD_LIBRARY_PATH=. ./runpeg CanYouHearMe.peg
RAD-EAR-3 CPU initialized, running at 10MHz

Board serial number: sun{d0_n0t_fEAR_th1s_c4t3g0ry}
sun{d0_n0t_fEAR_th1s_c4t3g0ry}
Access Code
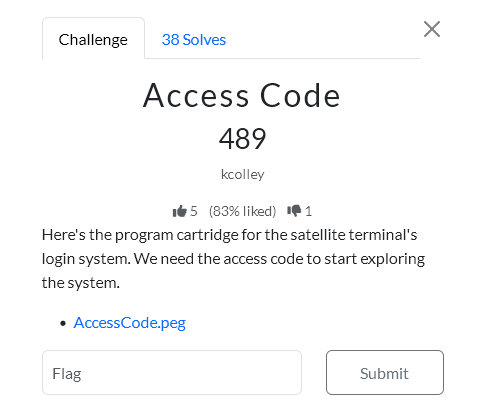
Writeup author: kerszi
The beginning
This task is much more difficult. It was a typical reverse engineering challenge — you had to enter the correct password. After three attempts, you receive a hash. The first thing you should do after running the program (which I didn't do) is read the documentation, as it really helps a lot. I simply ran the binary in pwngdb and debugged it with pwn --args ./runpeg AccessCode.peg. Of course, this worked, but I didn't find anything interesting. There were no useful strings in memory either. Then I tried ltrace ./runpeg AccessCode.peg, which showed me something interesting.
...
write(1, "s", 1s)                                                                          = 1
write(1, "s", 1s)                                                                          = 1
write(1, " ", 1 )                                                                          = 1
write(1, "c", 1c)                                                                          = 1
write(1, "o", 1o)                                                                          = 1
write(1, "d", 1d)                                                                          = 1
write(1, "e", 1e)                                                                          = 1
write(1, ":", 1:)                                                                          = 1
write(1, "\n", 1
)                                                                         = 1
write(1, ">", 1>)                                                                          = 1
write(1, " ", 1 )                                                                          = 1
...
This showed that the strings are displayed one character at a time. I was also surprised that there were no message strings in the binary, but if I had read the documentation, I would have known that the first bit in the text was enabled, which obfuscated all the information. It would have been enough to disable the first bit in every byte throughout the binary to find a few more strings. As it was, I didn't even know what to enter—whether the whole flag or just the password—and then I would have seen the flag.
Strings #1
010 editor and noticed some interesting strings: n{ and su, which could combine to form sun{. That probably wasn't a coincidence. The password might have been the flag, and that's what I assumed. 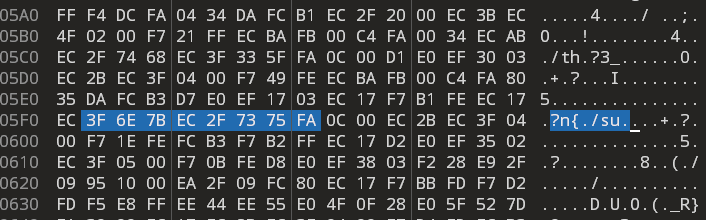
Hash
I also tried to crack the hash, but it wasn't possible; later I found out it wasn't sha-256. However, I was curious whether the hash was generated or just hardcoded. I checked this by changing the letter s at 0x5f6 in the binary to something else and running the program. I got a different hash, which confirmed that the hash was generated.
Strings #2
I wanted to see how the instructions were executed in the debugger, so I disassembled the entire code step by step. Fortunately, runpeg has a --trace option, which lets you observe the code execution, and bingo I found 0x7573, which corresponds to us. The visible 0x7B6E is {n. This already forms the beginning of the flag sun{. Remember when I mentioned editing the letter s at address 05F6? Here, too, is that address and the same letter, just shifted by 0x100 forward. So everything matches so far...
	06EE.0000:   MOV     A0, S0
	06F0.0000:   MOV     A2, 0x7B6E
	06F4.0000:   MOV     A1, 0x7573
	06F8.0000:   PSH     {A1-A2}
	06FB.0000:   MOV     A1, SP
	06FD.0000:   MOV     A2, 0x4
	0701.0000:   FCR     @gimli_absorb
I thought I could find more letters, so I kept searching. Next, there was 0x6874 and 0x5F33, which together formed th3_:
        06C0.0000:   MOV     A1, 0x6874
        06C4.0000:   MOV     A2, 0x5F33
        06C8.0000:   PSH     {A1-A2}
The last fragment I found using this method was the end of the flag, EAR}. Although at this point, the values started to get mixed in A3. See?
        0734.0000:   RDC     A3, INSN_COUNT_LO
        0736.0000:   RDC     A4, INSN_COUNT_HI
        0738.0000:   ADD     A3, 0x280F
        073C.0000:   ADD     A4, 0x7D52
        0740.0000:   PSH     {A3-A4}
        0743.0000:   MOV     A0, S0
        0745.0000:   MOV     A1, SP
        0747.0000:   MOV     A2, 0x4
        074B.0000:   FCR     @gimli_absorb
But what about the rest? Well, I had to start debugging. First, I needed to run the program in debug mode: ./runpeg ./AccessCode.peg -d. After many attempts and blind searching, I set a breakpoint at 0x04E9, which is @gimli_absorb_byte, then continued with c and checked what changed in (A1).
(dbg) b @gimli_absorb_byte
Created breakpoint #1 at address 04E9 (X)
(dbg) c
HW breakpoint #1 hit trying to execute 1 byte at 04E9
A breakpoint was hit

Thread state:
        (ZERO)R0: 0000      (S1)R8: FD97
          (A0)R1: 0A00      (S2)R9: 0004
          (A1)R2: 0073     (FP)R10: FD90
          (A2)R3: 0004     (SP)R11: FD8A
          (A3)R4: 0000     (RA)R12: 053B
          (A4)R5: 0000     (RD)R13: 0000
          (A5)R6: EA23     (PC)R14: 04E9 //@gimli_absorb_byte+0
          (S0)R7: 0A00    (DPC)R15: 0000
FLAGS: zspcvXr

Next instructions:
@gimli_absorb_byte:
                  04E9.0000: LDW     A2, [A0 + 0x30]
                  04EE.0000: ADD     A2, A0
                  04F0.0000: LDB     A3, [A2]
                  04F2.0000: XOR     A3, A1
                  04F4.0000: STB     [A2],A3
(dbg)
As you can see, A1 contains 0x73, which is the letter s. I thought I was about to get the flag. I continued like this a dozen times, but then the pattern started to break down. The worst part was that I couldn't inspect the memory fragment. There was an xxd command, but I couldn't see the whole thing. What did I do? I Checked pid of ./runpeg
kerszi 14890 0.0 0.0 2928 1536 pts/6 S+ 22:11 0:00 ./runpeg ./AccessCode.peg -d
and launched pwngdb in another console with the process running AccessCode using the command:
gdb -p 14890
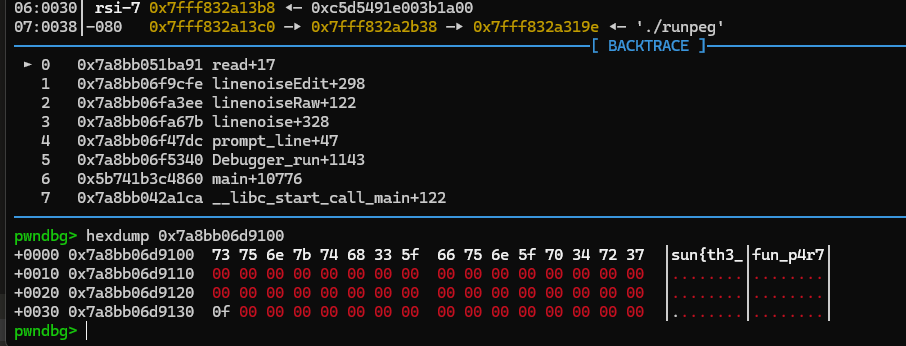
The Flag
I didn't know what else to do. I tried brute-forcing the missing letters with Hashcat, but that didn't work. ChatGPT tried to help, but ended up causing more confusion, suggesting endings like fEAR} and other nonsense. I zeroed out the first bit in the entire binary and found a fragment at the end of the program: 4r7_15_no. The o wasn't encoded and messed up the fragment, so it should have been 4r7_15_n. I thought maybe I should set a breakpoint at @gimli_absorb, which is address 0x0503. That turned out to be the right approach. Thanks to this, I FINALLY got the flag.
EAR debugger
(dbg) b 0503
Created breakpoint #1 at address 0503 (X)
(dbg) c
HW breakpoint #1 hit trying to execute 1 byte at 0503
A breakpoint was hit

Thread state:
   (ZERO)R0: 0000      (S1)R8: FD97
     (A0)R1: 0A00      (S2)R9: 0004
     (A1)R2: 0073     (FP)R10: FD90
     (A2)R3: 0A00     (SP)R11: FD8A
     (A3)R4: 0073     (RA)R12: 0540
     (A4)R5: 0000     (RD)R13: 0000
     (A5)R6: EA23     (PC)R14: 0503 //@gimli_advance+0
     (S0)R7: 0A00    (DPC)R15: 0000
FLAGS: zspcvXr

Next instructions:
@gimli_advance:
        0503.0000: ADD     A1, A0, 0x30
        0508.0000: LDW     A2, [A1]
        050A.0000: INC     A2, 1
        050C.0000: STW     [A1],A2
        050E.0000: CMP     A2, 0x10
(dbg)

.....

(dbg) c
HW breakpoint #1 hit trying to execute 1 byte at 0503
A breakpoint was hit

Thread state:
   (ZERO)R0: 0000      (S1)R8: FD9A
     (A0)R1: 0A00      (S2)R9: 0001
     (A1)R2: 007D     (FP)R10: FD90
     (A2)R3: 0A08     (SP)R11: FD8A
     (A3)R4: 00B2     (RA)R12: 0540
     (A4)R5: 7D52     (RD)R13: 0000
     (A5)R6: 0DC8     (PC)R14: 0503 //@gimli_advance+0
     (S0)R7: 0A00    (DPC)R15: 0000
FLAGS: zspcvXr

Next instructions:
@gimli_advance:
        0503.0000: ADD     A1, A0, 0x30
        0508.0000: LDW     A2, [A1]
        050A.0000: INC     A2, 1
        050C.0000: STW     [A1],A2
        050E.0000: CMP     A2, 0x10
(dbg) bp clear
Cleared all breakpoints
(dbg) c
Input security access code:
> sun{th3_fun_p4r7_15_nEAR}
Access granted!
Final
This was a very interesting task that taught me how to approach a new processor. I kept complaining about the author introducing so many rabbit holes, but I learned a lot. Good job. I didn't finish the last task of this type there simply wasn't enough time. Maybe I would have solved it, maybe not.
sun{th3_fun_p4r7_15_nEAR}
Bonus
Optionally, You can find all resources to tests: https://github.com/MindCraftersi/ctf/tree/main/2025/SunshineCTF